
Replacing anything feels difficult when we don’t know where to start. A mechanical seal was no different until we understood the right steps.
At first, I thought replacing a mechanical seal would be complicated.
If you are facing the same problem, you might be wondering:
I’ve replaced the mechanical seal several times, but the pump is still leaking.
I’m tired of replacing the mechanical seal using the wrong process.
Why does my mechanical seal keep failing even after a replacement?
The replacement process varies by pump and seal design, but the core steps are isolation, disassembly, inspection, installation, reassembly and commissioning.
This guide explains how to replace a mechanical seal, what to check before installation, which tools and safety precautions are required, and how to test the pump after replacement.
Why do mechanical seals fail?
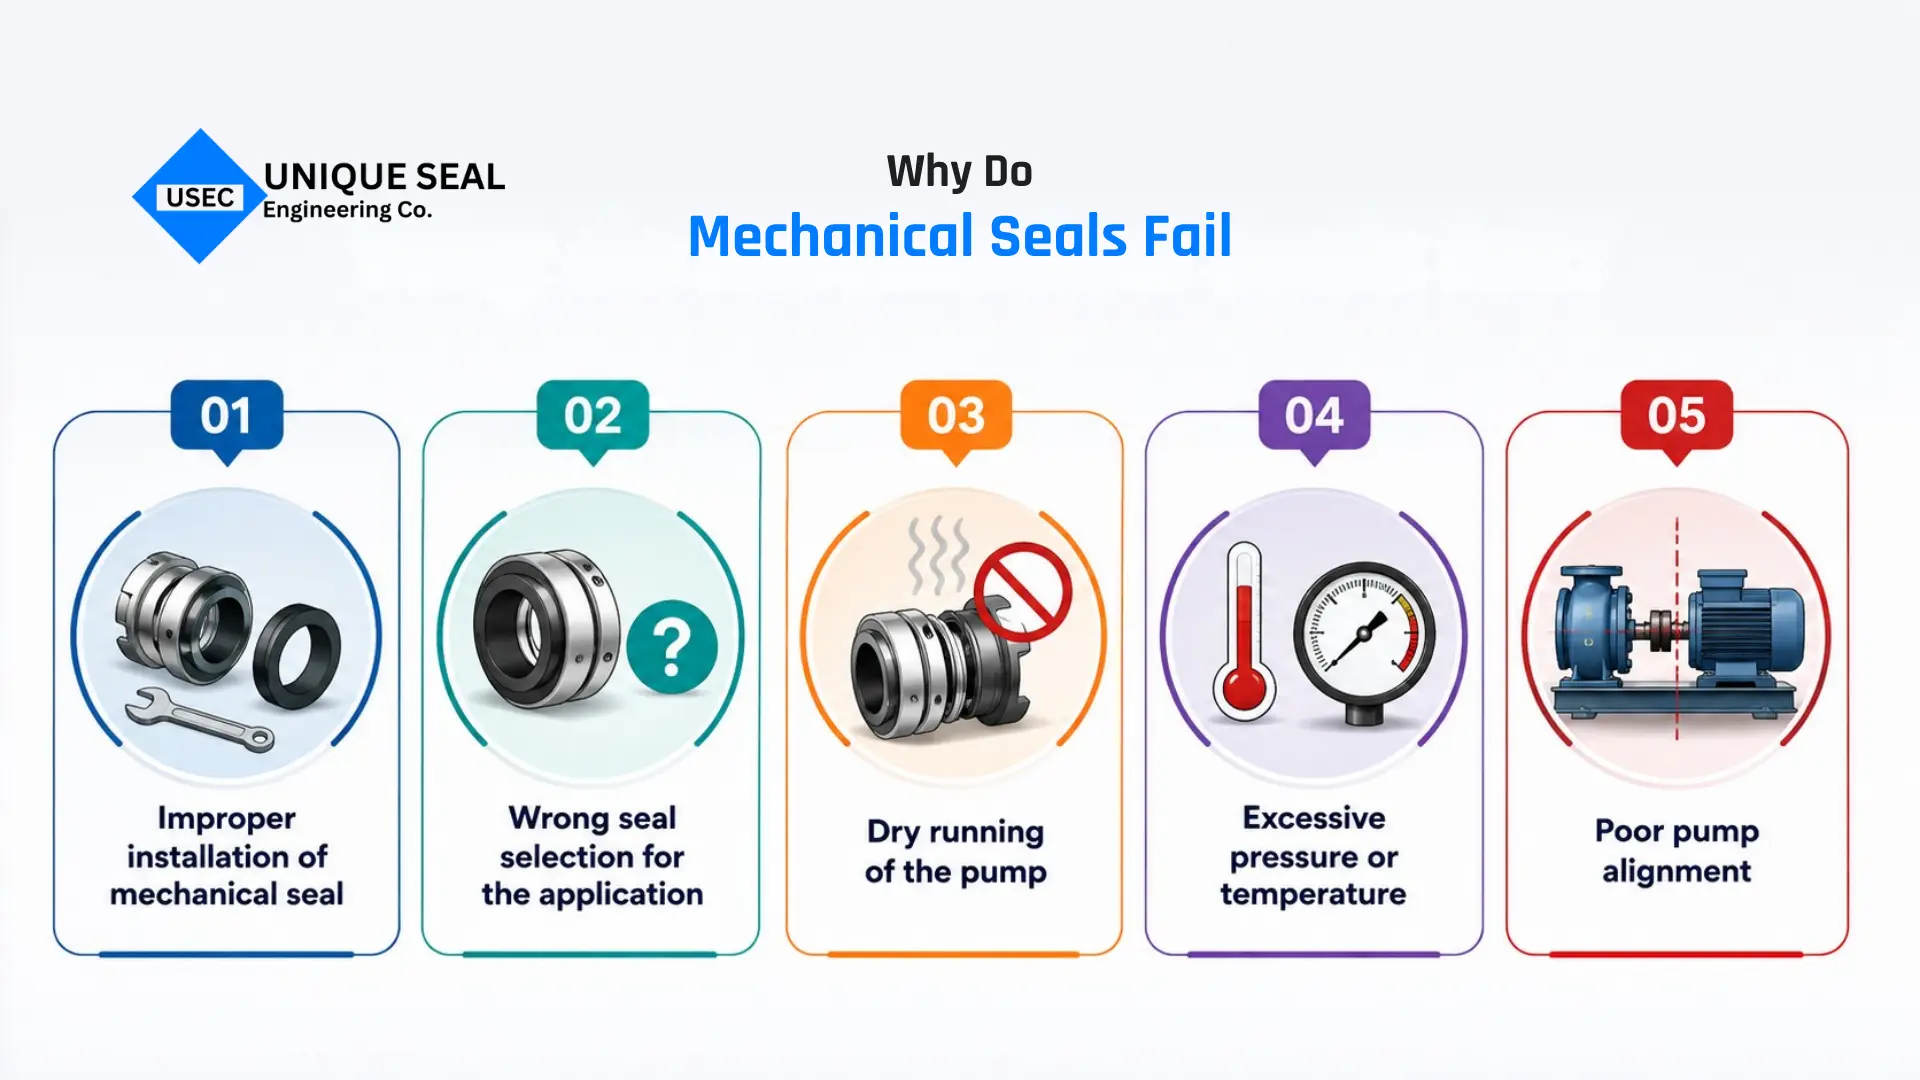
Mechanical seals can fail due to several reasons, from installation issues to incorrect pump conditions. Understanding these common causes can help prevent repeated failures and improve seal performance.
Improper installation of mechanical seal
Installing a mechanical seal incorrectly is one of the common reasons for every seal failure. If the seal is not fitted properly, it can cause leakage, damage parts and reduce overall life of the seal. Proper installation helps the seal work better and last longer.
Wrong seal selection for the application
Choosing the wrong mechanical seal for a pump or operating condition can lead to early failure. Different applications require different seal types and materials. Using an unsuitable seal can cause leakage, poor performance and frequent replacements.
Dry running of the pump
A mechanical seal needs enough liquid to work properly. When a pump runs without sufficient liquid, the seal can be damaged due to heat and friction. This can cause seal failure and may require replacement.
Excessive pressure or temperature
Mechanical seals are designed to work within certain pressure and temperature limits. When these conditions become too high, the seal faces wear out faster and may stop working properly, leading to early seal failure.
Poor pump alignment
Proper alignment is important for smooth pump operation. When the pump parts are not aligned correctly, it can put extra stress on the mechanical seal and cause uneven wear. This may lead to leakage, seal damage and the need for replacement.
Common signs your mechanical seal needs replacement
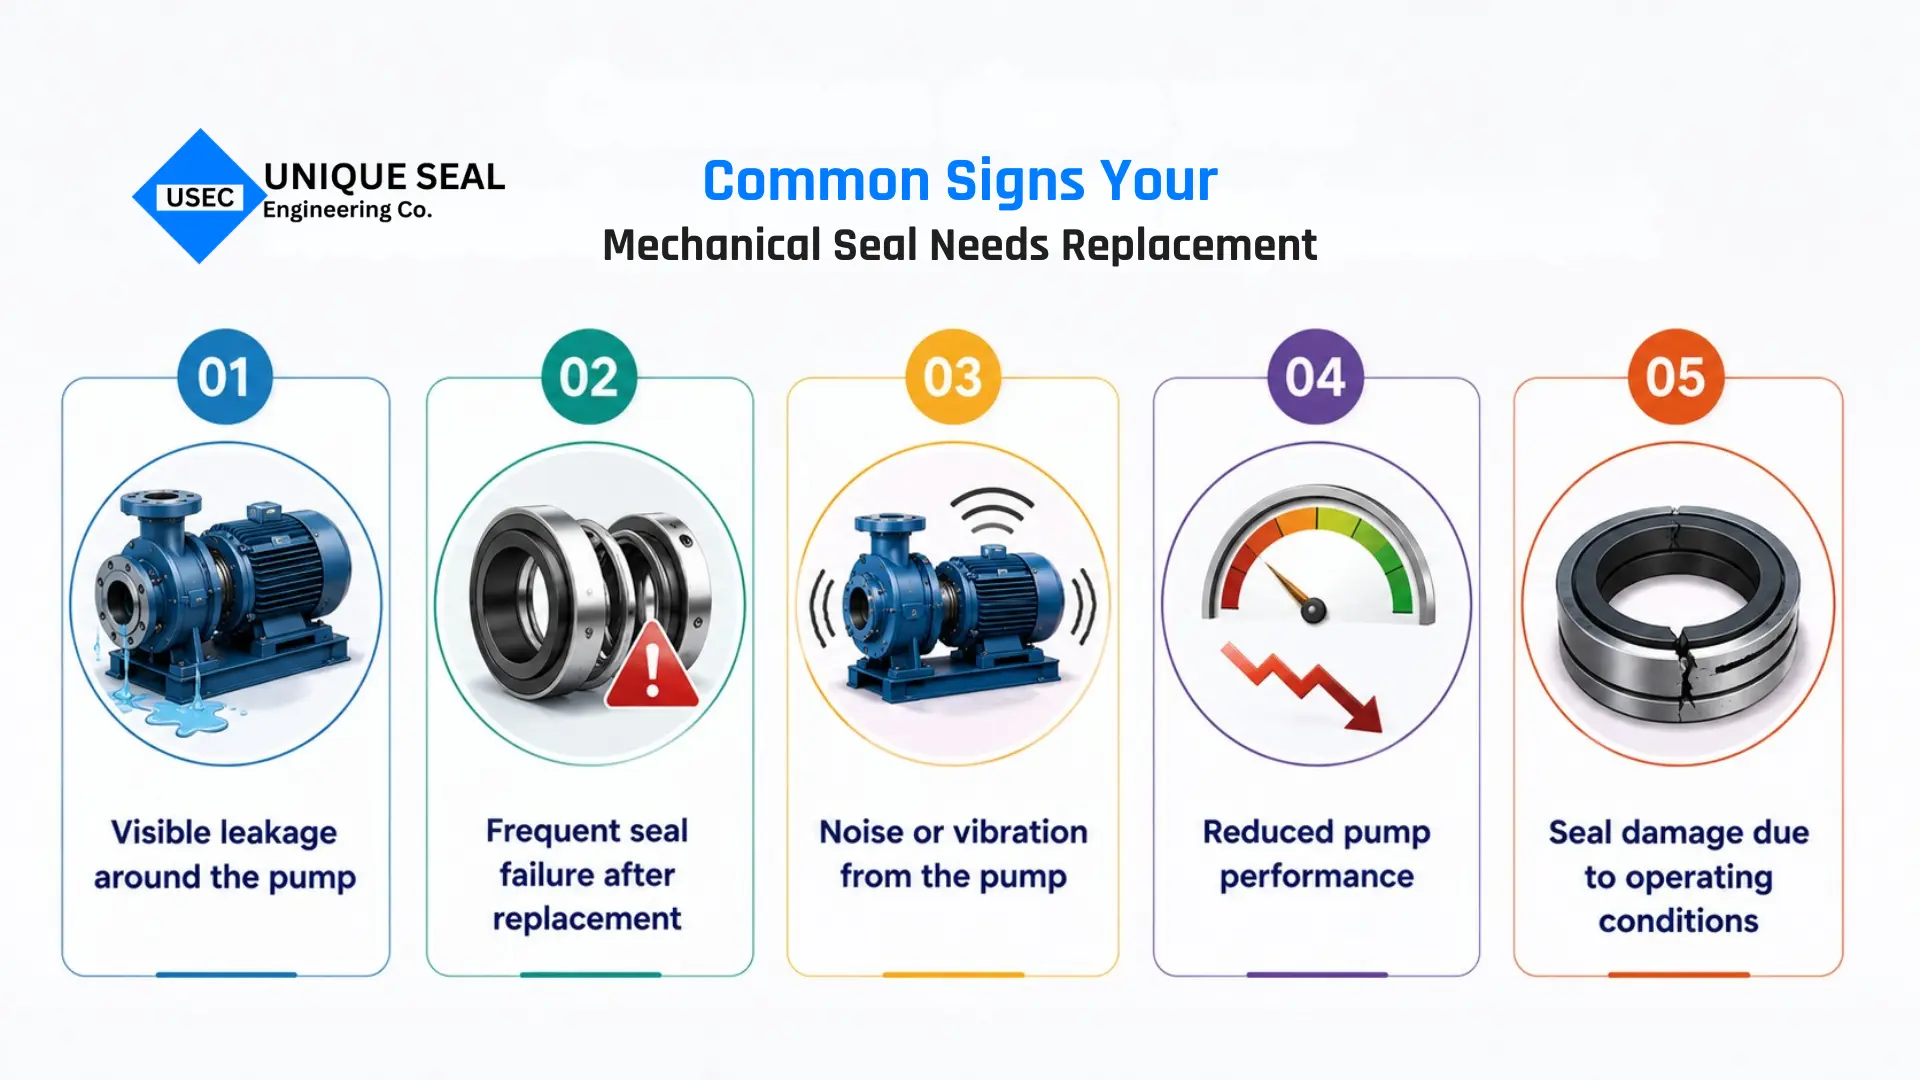
A damaged or worn-out mechanical seal can affect pump performance and may require replacement. Identifying these common signs early can help prevent bigger problems and reduce unexpected downtime.
Visible leakage around the pump
One of the most common signs that a mechanical seal needs replacement is visible leakage around the pump area. When the seal wears out or gets damaged, it can cause liquid to leak from the pump. If the leakage continues even after checking the pump, it may be time to replace the mechanical seal to prevent further issues.
Frequent seal failure after replacement
If a mechanical seal fails again soon after replacement, there may be an issue with the installation process, wrong seal selection or pump operating conditions. Repeated failures are a sign that the actual problem needs to be checked before installing a new one.
Noise or vibration from the pump
Strange noise or unusual vibration from the pump can be a sign of a damaged mechanical seal. These issues may affect the seal performance and indicate that the pump needs inspection before replacing the seal.
Reduced pump performance
A worn out mechanical seal can affect how smoothly the pump operates. If you notice changes in pump performance along with leakage or pressure issues, the mechanical seal may need to be inspected and replaced.
Seal damage due to operating conditions
Mechanical seals are designed to work under high pressure, temperature and fluid conditions. When a pump operates outside these limits, the seal can get damaged over time and may need replacement to maintain reliable operations.
Tools & safety precautions before replacing a mechanical seal
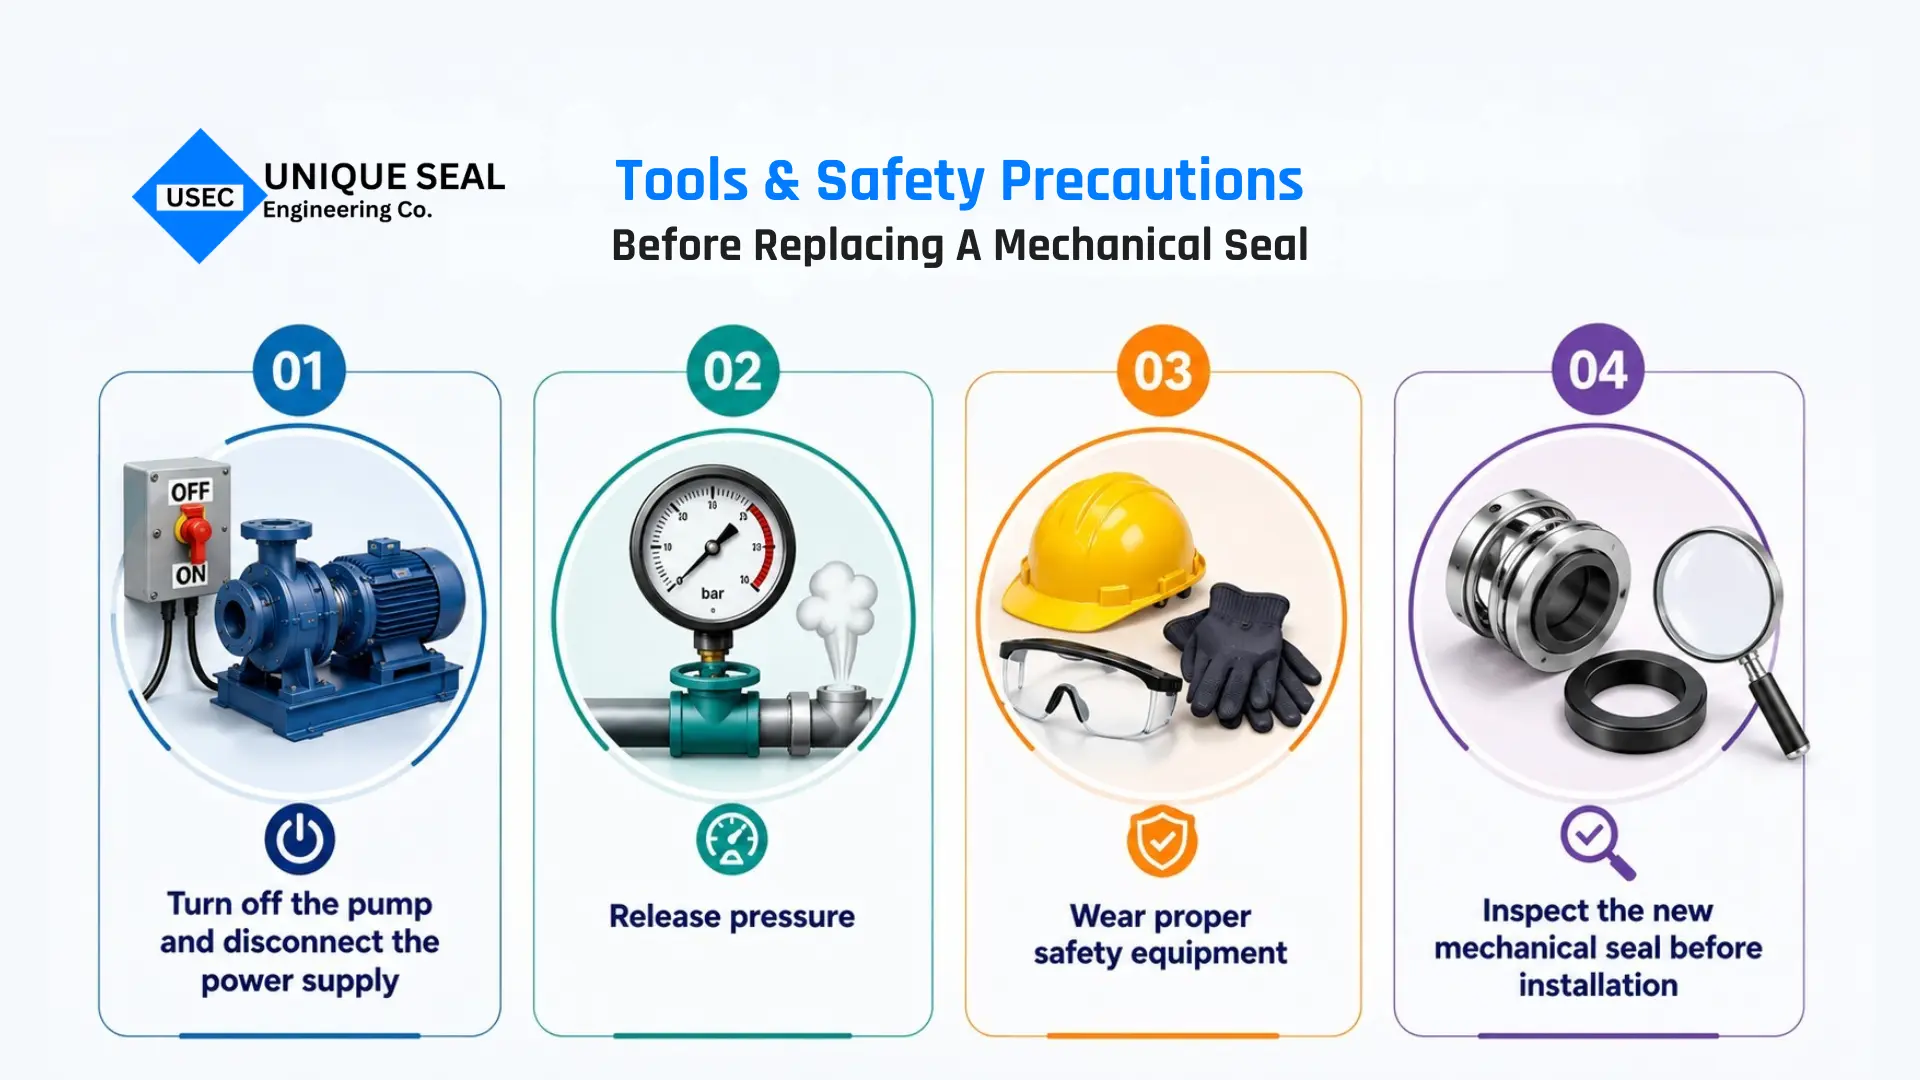
Before starting the replacement process, make sure you have all the required tools ready. Common tools include screwdrivers, wrenches, pliers, a soft cloth, and measuring tools for proper installation. The right tools help make the replacement process easier and prevent damage to the seal or pump parts.
Turn off the pump and disconnect the power supply
Before replacing the mechanical seal, turn off the pump and disconnect it from the power supply. Make sure the pump has completely stopped before starting any work. This keeps the replacement process safer and prevents accidental startup.
Release pressure
Make sure there is no pressure left inside the pump before opening it. Drain the remaining liquid from the pump as well. This makes it safer to remove the old mechanical seal and start the replacement.
Wear proper safety equipment
Before removing the old mechanical seal, wear safety gloves and protective glasses. This helps protect your hands and eyes while working with the pump and handling the seal during replacement. Also, make sure your work area is dry and clean before you begin.
Inspect the new mechanical seal before installation
Check the new mechanical seal for cracks, scratches, or visible damage. Make sure it is clean and suitable for your pump. A quick inspection helps prevent problems during installation and keeps the replacement process smooth.
How to replace a mechanical seal step by step?
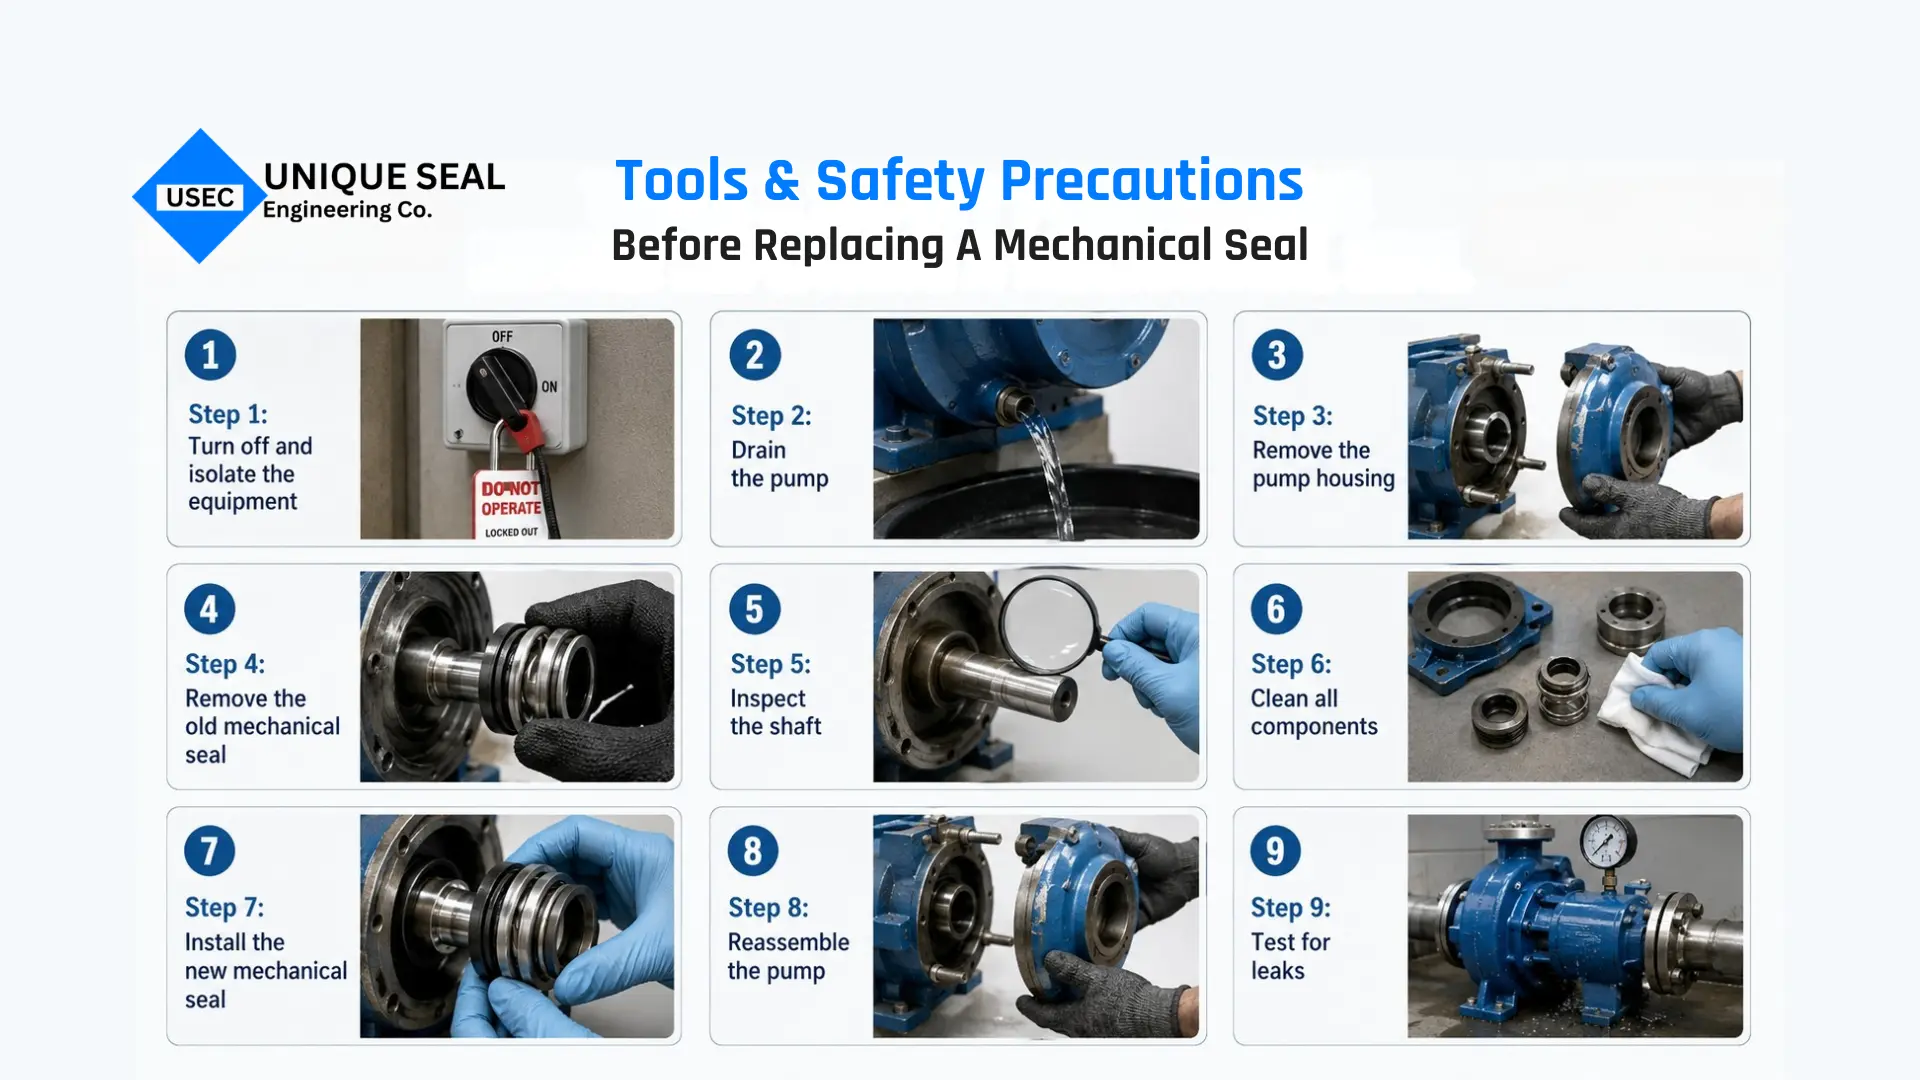
Replacing a mechanical seal requires the right process and careful handling. Follow these general steps to remove the old seal, install a new one, and check the pump properly after replacement.
Experiencing Frequent Mechanical Seal Failures?
Recurrent seal leakage causes costly unplanned downtime, batch losses, and shaft fretting. Unique Seal Engineering Co. analyzes your exact operating parameters (shaft speed, fluid media, temperature, pressure) and provides custom face pairings and engineered seal recommendations.
Step 1: Turn off and isolate the equipment
Make sure the pump is safely stopped and cannot start while you are working. Keep the area around the pump clear so you can easily access the parts that need to be removed.
Step 2: Drain the pump
Open the pump’s drain point and let the remaining liquid flow out completely. Once the pump is empty, you can safely access the internal parts for seal replacement.
Step 3: Remove the pump housing
Remove the bolts from the pump housing and carefully take the housing off. This will give you access to the mechanical seal inside the pump.
Step 4: Remove the old mechanical seal
Take out the old mechanical seal carefully from its position. Avoid using too much force, as this can damage the shaft or other pump parts.
Step 5: Inspect the shaft
Check the shaft for scratches, cracks, rust, or signs of wear. Make sure it is in good condition before installing the new mechanical seal.
Step 6: Clean all components
Clean the shaft, seal area, and other pump parts properly. Remove any dirt, old seal material, or liquid buildup to keep the components ready for smooth operation.
Step 7: Install the new mechanical seal
Fit the new mechanical seal carefully in the correct position. Make sure all parts are properly aligned to avoid leakage and ensure proper sealing performance
Step 8: Reassemble the pump
Put all the removed parts back in their original position. Tighten the bolts properly and make sure the pump is assembled correctly after replacing the mechanical seal.
Step 9: Test for leaks
Start the pump and check the mechanical seal area for any signs of leakage. Make sure the pump is working properly and the new seal is performing as expected.
For a better understanding of the replacement process, watch this video demonstration of mechanical seal replacement.
Maintenance tips to extend mechanical seal life
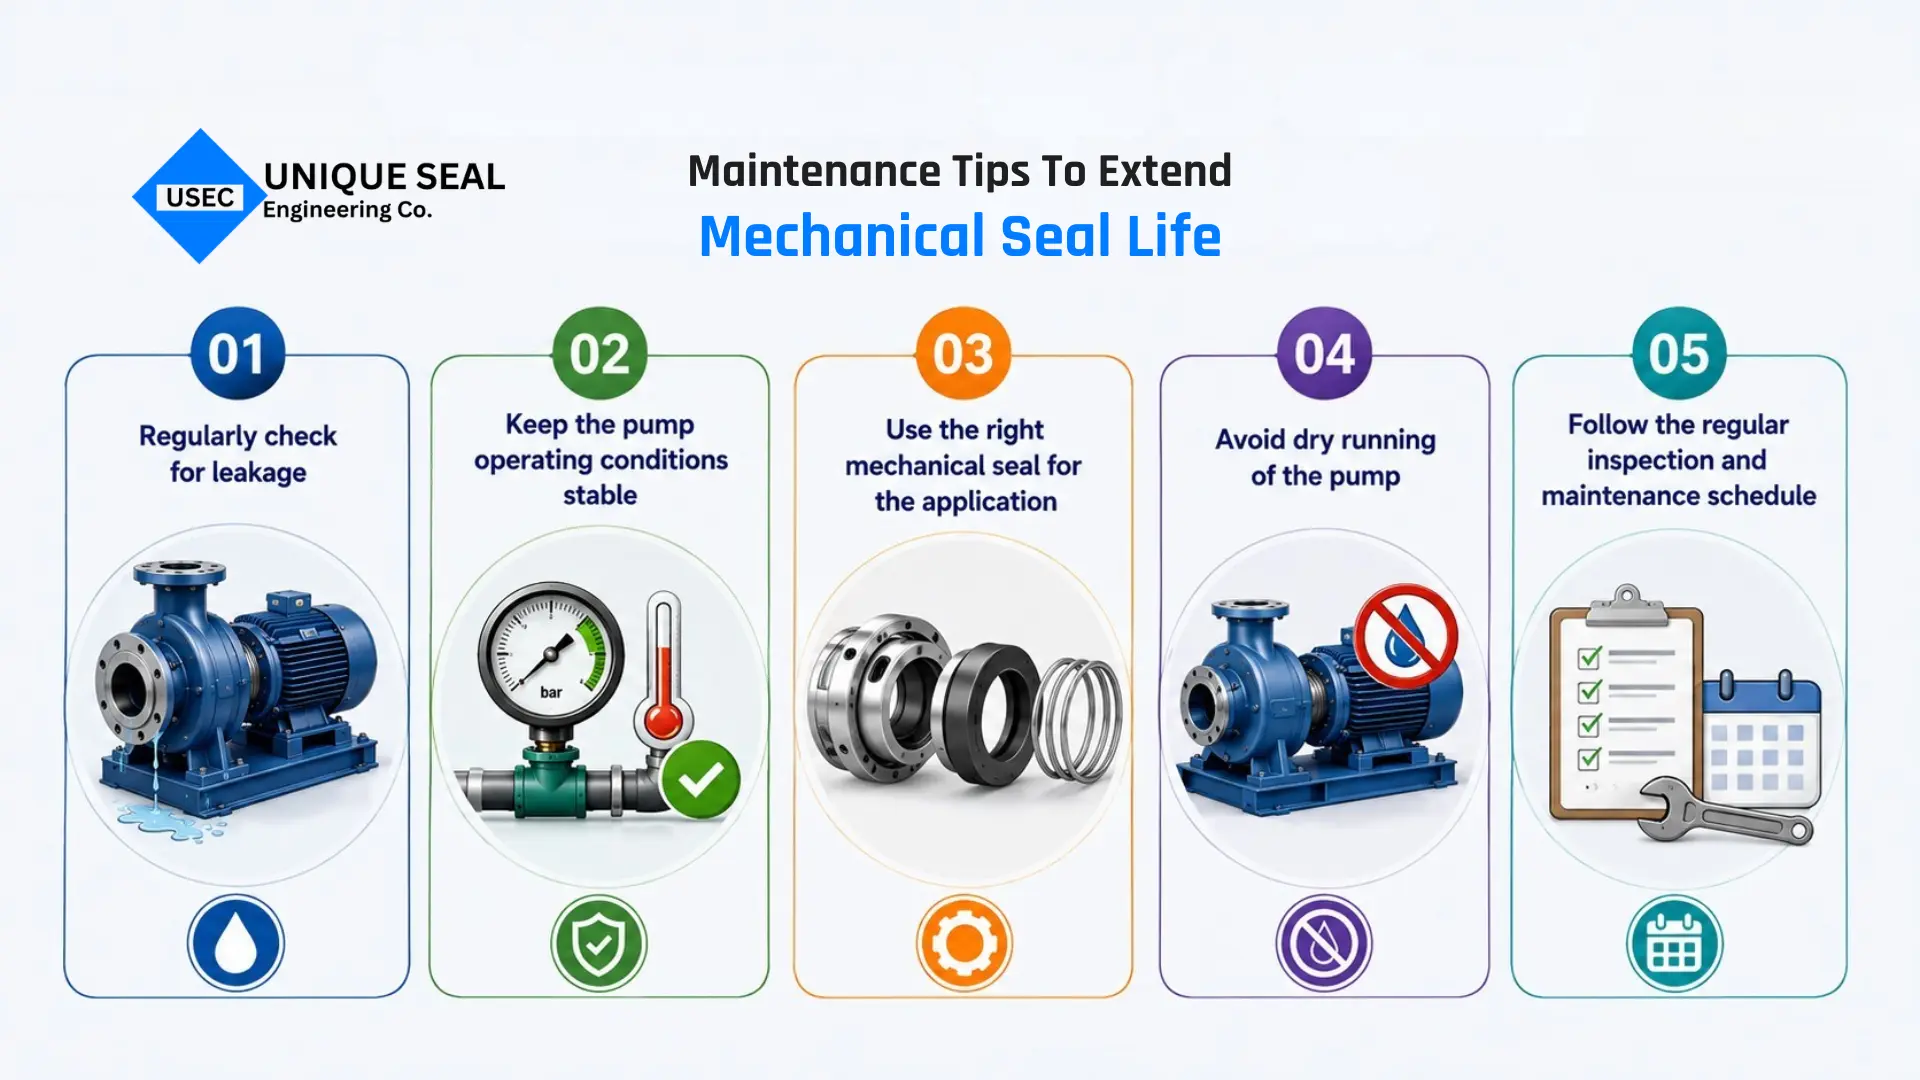
Regularly check for leakage
Check the mechanical seal area regularly for any signs of leakage. Finding small leaks early can help prevent bigger problems and reduce the chances of sudden seal failure.
Keep the pump operating conditions stable
Keep the pump pressure, temperature, and working conditions within proper limits. This helps reduce stress on the mechanical seal and improves its life.
Use the right mechanical seal for the application
Choose a mechanical seal that matches your pump and working conditions. The right seal helps prevent early damage and improves overall performance.
Avoid dry running of the pump
Do not run the pump without enough liquid. Dry running can damage the mechanical seal and reduce its working life.
Follow the regular inspection and maintenance schedule
Check the pump and mechanical seal regularly for any problems. Regular maintenance helps avoid sudden failures and keeps the seal in good condition.
Ready to replace a mechanical seal with the right approach?
Replacing a mechanical seal does not have to be a difficult task when you understand the correct process. From identifying the signs of failure to following the right replacement steps, proper knowledge helps you avoid common issues and complete the mechanical seal replacement more effectively.
A successful replacement depends on choosing the right seal, following proper installation steps, and maintaining the pump regularly. By taking the right approach, you can improve seal performance, reduce unexpected failures, and keep your pump working reliably for a longer time.
When it comes to mechanical seal replacement, choosing the right seal is just as important as following the correct installation process. Unique Seal provides different mechanical seals for various pump applications, helping users find the right sealing solution.
Find the right mechanical seal for your needs. Get your free quote today.
Frequently asked questions about how to replace mechanical seal
How long does a mechanical seal last?
A mechanical seal can last from a few months to several years depending on pump usage, operating conditions, maintenance, and proper installation. Regular inspection and using the right seal can help extend its working life.
Can I replace a mechanical seal myself?
Yes, a mechanical seal can be replaced yourself if you have the right tools, knowledge, and follow the correct process. However, proper handling is important to avoid damaging the pump parts or causing leakage after replacement.
Why does my new seal still leak?
A new mechanical seal may still leak due to improper installation, wrong seal selection, damaged parts, or incorrect pump conditions. Checking the installation process and pump components can help identify and fix the issue.
What causes premature seal failure?
Premature seal failure can happen due to improper installation, dry running, wrong seal selection, excessive pressure, or poor pump conditions. Regular maintenance and using the correct mechanical seal can help prevent early damage and failures.
Should I lubricate a mechanical seal?
Most mechanical seals do not require additional lubrication because the pumped liquid helps keep the seal faces working properly. Always follow the seal manufacturer’s guidelines to avoid damage or performance issues.
How much does replacement cost?
The cost of mechanical seal replacement depends on the seal type, pump model, application, and installation requirements. A proper inspection helps determine the right replacement option and overall cost for the repair.
Need a High-Reliability Replacement Mechanical Seal?
Unique Seal Engineering Co. manufactures Cartridge, Metal Bellows, PTFE Bellows, and Multi-Spring Seals with 100% optical flat inspection under monochromatic light at our Mohan Nagar, Ghaziabad facility. Get fast OEM-grade delivery across India and worldwide.
